Undermount Sink Brackets For Granite
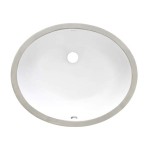
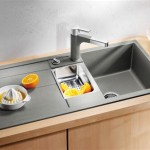
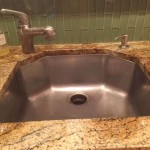
Undermount sinks are becoming increasingly popular in kitchens and bathrooms. They offer a sleek, modern look and are easy to clean. However, installing an undermount sink can be a challenge, especially if you're working with granite countertops. Granite is a very hard material, and it can be difficult to create a secure and watertight seal between the sink and the countertop.
That's where undermount sink brackets come in. These brackets are designed to support the sink from below, and they help to create a strong and durable seal. There are a few different types of undermount sink brackets available, so it's important to choose the right ones for your sink and countertop.
Types of Undermount Sink Brackets
There are two main types of undermount sink brackets: front-mount and side-mount. Front-mount brackets are attached to the front of the sink, while side-mount brackets are attached to the sides of the sink. Front-mount brackets are more common, and they're easier to install. However, side-mount brackets can provide more support for the sink, especially if it's a large or heavy sink.
When choosing undermount sink brackets, it's important to consider the material of your sink and countertop. Granite is a very hard material, so you'll need to choose brackets that are strong enough to support the weight of the sink. You'll also need to make sure that the brackets are compatible with the material of your sink. For example, some brackets are designed for use with stainless steel sinks, while others are designed for use with porcelain sinks.
Installing Undermount Sink Brackets
Installing undermount sink brackets is a relatively simple process. However, it's important to follow the manufacturer's instructions carefully to ensure that the brackets are installed correctly. Here are the basic steps involved in installing undermount sink brackets:
- Measure the distance between the front of the sink and the back of the countertop.
- Mark the location of the brackets on the countertop.
- Drill pilot holes for the screws.
- Attach the brackets to the countertop.
- Place the sink on the brackets.
- Secure the sink to the countertop with screws.
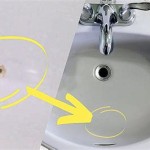
Once the brackets are installed, you can caulk the seam between the sink and the countertop to create a watertight seal. It's also a good idea to apply a bead of silicone caulk around the drain hole to prevent water from leaking.
Tips for Installing Undermount Sink Brackets
Here are a few tips for installing undermount sink brackets:
- Use a level to make sure that the brackets are installed evenly.
- Tighten the screws securely, but don't overtighten them.
- Apply a bead of caulk to the seam between the sink and the countertop before securing the sink.
- Allow the caulk to dry completely before using the sink.
By following these tips, you can ensure that your undermount sink is installed correctly and securely.

Installing Undermount Sink Clips Granite Quartz Countertop

1810 6 X Z Clips For Fixing Ceramic Undermount Sinks To Granite Worktops

Granite Marble Sink Anchor Kit 4 Sets Of Hardware 633 Epoxy Counter Balance

Undermount Sink Bracket Kit Front Back Mount

Install An Undermount Sink In A Solid Surface Countertop Rona

Sinkits Slot Clip Undermount Sink For Granite Quartz Concrete Or Other Hard Material Youtube

Undermount Sink Installation Tool Set

Kitchen Bathroom Undermount Sink Repair Kit Support Bracket Granite Countertop

Install An Undermount Sink In A Solid Surface Countertop Rona

How To Install Undermount Sink In Granite Stud And Clip Method