Replacing Bathroom Countertop and Sink
Replacing a bathroom countertop and sink can dramatically enhance the aesthetics and functionality of the space. This seemingly complex project can be accomplished with careful planning and execution. This article provides a comprehensive guide to navigating the process, covering material selection, demolition, installation, and essential considerations.
Choosing the Right Materials
The first step involves selecting appropriate materials for the countertop and sink. Various options are available, each with unique advantages and disadvantages regarding cost, durability, and maintenance. Popular countertop materials include natural stone (granite, marble), engineered stone (quartz), solid surface, and laminate. Natural stone offers a luxurious appearance but requires regular sealing. Engineered stone provides durability and stain resistance, while solid surface materials are seamless and easy to repair. Laminate is a budget-friendly option, but it's less resistant to scratches and chips.
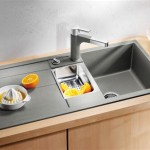
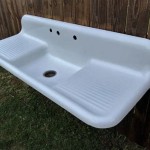
Sink selection is equally important. Common sink types include undermount, drop-in, vessel, and integrated. Undermount sinks create a sleek, seamless look and simplify countertop cleaning. Drop-in sinks are easy to install and fit into existing countertop cutouts. Vessel sinks sit above the counter, adding a stylish focal point. Integrated sinks are molded as part of the countertop, creating a cohesive and hygienic surface.
The chosen materials should complement the overall bathroom design and meet the user's practical needs. Consider factors like budget, desired aesthetic, and maintenance requirements when making these decisions. Accurately measuring the existing countertop and sink area is crucial for selecting appropriately sized replacements.
Demolition and Preparation
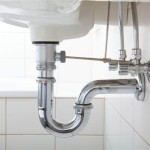
Before starting demolition, it's essential to turn off the water supply to the sink. This typically involves closing the shut-off valves located under the sink. Once the water is off, disconnect the supply lines and the drain pipe. If the old sink is caulked to the countertop, carefully cut the caulk with a utility knife. Depending on the sink type, it might be secured with clips or screws from underneath. Remove these fasteners to detach the sink from the counter.
Next, remove the countertop. If the countertop is attached to the vanity cabinet with screws, unscrew them. If it’s adhered with adhesive, carefully pry it loose using a putty knife or pry bar. Exercise caution during this process to avoid damaging the vanity. Once the countertop is removed, clean the vanity top thoroughly to prepare for the new installation. This may involve removing old adhesive residue or leveling any uneven surfaces.
Properly disposing of the old countertop and sink is crucial. Check local regulations regarding disposal procedures for construction debris. Some municipalities may require specific disposal methods or offer designated collection sites.
Installation of New Countertop and Sink
The installation process varies slightly depending on the chosen materials and sink type. For pre-fabricated countertops, dry-fit the new countertop onto the vanity to ensure a proper fit. If necessary, make minor adjustments to the vanity or countertop edges. Apply a bead of silicone caulk to the top edges of the vanity cabinet where the countertop will rest. Carefully position the new countertop onto the vanity, pressing it firmly into the caulk. Secure the countertop to the vanity using screws, if required.
For undermount sinks, apply a bead of silicone sealant around the rim of the sink cutout in the countertop. Carefully lower the sink into the cutout, ensuring the sealant creates a watertight bond. Secure the sink to the countertop using mounting clips or brackets provided by the manufacturer. Connect the water supply lines and the drain pipe, ensuring all connections are tight and leak-free.
If installing a drop-in sink, apply a bead of plumber's putty around the rim of the sink cutout in the countertop. Carefully place the sink into the cutout and press down firmly to create a seal. Secure the sink using the provided clips or fasteners. Connect the water supply and drain lines. For vessel sinks, place the sink on the countertop and mark the drain and faucet locations. Drill the necessary holes and install the faucet and drain assembly. Apply sealant around the base of the vessel sink to secure it to the countertop.
After installation, test the water supply lines and drain for leaks. Allow the sealant to cure completely before using the sink. Clean the new countertop and sink thoroughly to remove any debris or residue from the installation process.

How To Replace A Bathroom Countertop Homeadvisor

Replace Vanity Top And Faucet Diy Network Youtube

How To Remove Replace A Vanity Top Easy Bathroom Sink Remodel Youtube

Replace Granite Countertops Transform Your Bathroom S Look
How To Get Replacement Countertops For Your Bathroom Vanity Trubuild Construction

2024 Cost To Replace Bathroom Countertop A Guide

How To Replace A Vanity Top And Save Craving Some Creativity

Paint Bathroom Vanity Countertop Sink So Easy A Piece Of Rainbow

Bathroom Countertop Dad S Construction Best Local Contractor

How To Remove A Countertop From Vanity Decor Adventures


