Installing a Disposal in a Double Sink
Installing a garbage disposal in a double sink offers the convenience of quick and easy food waste cleanup in the kitchen. While the process might seem daunting, with careful planning and the right tools, it's a manageable DIY project for moderately skilled homeowners. This article provides a comprehensive guide for installing a disposal in a double sink, outlining the necessary steps and precautions.
Preparing for Installation
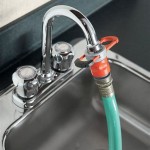
Before beginning the installation, it's crucial to gather the necessary tools and materials. This includes the new garbage disposal unit, a dishwasher drain connector (if applicable), plumber's putty, slip-joint pliers, a basin wrench, screwdrivers, and safety glasses. Turning off the power to the circuit breaker serving the disposal area is paramount for safety. Also, turn off the water supply to the sink.
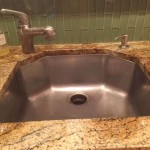
Next, examine the existing plumbing configuration under the sink. Identify the drain lines, the P-trap, and the dishwasher discharge line (if present). Most double sinks will have one sink designated for the disposal. If the existing drain lines are old or corroded, consider replacing them during the installation. Measure the existing drainpipe connections to ensure compatibility with the new disposal unit.
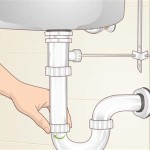
Removing the old sink drain components is the next step. Place a bucket under the sink to catch any residual water. Using slip-joint pliers and a basin wrench, carefully loosen and disconnect the P-trap and the drainpipes connecting to the sink drain flanges. If dealing with a pre-existing disposal, disconnect the power cord and the dishwasher discharge line. Remove the mounting assembly securing the old disposal.
Installing the New Garbage Disposal
Installing the new disposal unit begins with preparing the mounting assembly. The mounting assembly typically consists of a fiber gasket, a mounting ring, and mounting screws. Follow the manufacturer's instructions for the specific model for proper assembly. Apply a layer of plumber's putty to the underside of the sink flange before inserting it into the drain opening from above the sink.
From below the sink, secure the mounting ring to the sink flange with the provided screws. Next, carefully attach the disposal unit to the mounting assembly, ensuring it locks into place according to the manufacturer's instructions. Tighten the mounting screws evenly to secure the disposal unit firmly.
Connecting the drain lines is a critical step. Attach the drainpipe from the other sink to the disposal unit's inlet port, ensuring a tight seal. If connecting a dishwasher, attach the dishwasher discharge line to the designated port on the disposal unit. Reconnect the P-trap to the disposal unit's outlet port and the drainpipe leading to the main drain. Tighten all connections securely using slip-joint pliers.
Connecting and Testing the Disposal
With the plumbing connections complete, the next step is electrical connection. Following the manufacturer's instructions, connect the power cord to the disposal unit's wiring terminals. Ensure the connections are secure and properly insulated. If replacing an old unit, reuse the existing wiring and outlet. If installing a new outlet, ensure it is grounded and connected to the appropriate circuit breaker. Once wired, restore power to the circuit breaker.
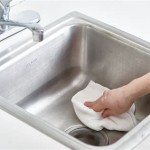
Before using the disposal, it's crucial to check for leaks. Run water into both sinks and carefully inspect all connections for any signs of leakage. If leaks are detected, tighten the connections as needed. Once all connections are leak-free, test the disposal unit by running cold water and turning it on. Observe the disposal operation and listen for any unusual noises. Properly installed unit should run smoothly and efficiently. Run it for a short period, grinding some ice cubes to clean the blades and flush away any debris.
Important Considerations for Double Sinks
When installing disposals in double sinks, particular considerations apply due to the dual drain configuration. Ensure the non-disposal sink drain connects to the disposal inlet using the appropriate drainpipe and fittings. This allows for proper drainage and prevents blockages. For efficient operation, use a basket strainer in the non-disposal sink to catch large food scraps and prevent them from clogging the disposal.
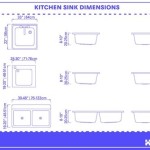
Consider the size and power of the disposal unit based on household needs. Larger households with frequent cooking might benefit from a higher horsepower disposal. Consult the manufacturer's specifications to choose the appropriate disposal unit based on family size and usage.
Plumbing Dual Sink With Garbage Disposal Setup Home Improvement Stack Exchange
Install Best Sink Garbage Disposal Er S Guide In 2024
How To Install A Garbage Disposer Menards
Diy Kitchen Sink Plumbing With Garbage Disposal Start To Finish Step By Youtube
Plumbing Dual Sink With Garbage Disposal Setup Home Improvement Stack Exchange
7 Steps To Install Your Garbage Disposal O Bannon Plumbing Sewer
Need With Sink Plumbing And Garbage Disposal Install Doityourself Com Community Forums
Picture Diagram Of Double Sink Plumbing With Garbage Disposal
How To Install Dual Kitchen Sink Drain Plumbing Pipes
Plumbing A Kitchen Double Sink With Dishwasher And Disposal Doityourself Com Community Forums