How To Replace The Sprayer On Kitchen Sink
A kitchen sink sprayer is a handy tool that makes cleaning dishes and other kitchen tasks much easier. However, over time, the sprayer can become worn or damaged, and it may need to be replaced. Replacing a kitchen sink sprayer is a relatively simple task that can be completed in a few minutes.
Here are the steps on how to replace the sprayer on kitchen sink:
1. Gather Your Tools and Materials
Before you begin, you will need to gather the following tools and materials:
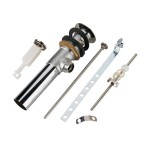
- New kitchen sink sprayer
- Adjustable wrench
- Plumber's putty
- Rags
2. Turn Off the Water Supply
The first step is to turn off the water supply to your kitchen sink. This will prevent water from leaking out when you remove the old sprayer.
To turn off the water supply, locate the shut-off valves under your sink. Turn the valves clockwise to close them.
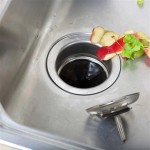
3. Remove the Old Sprayer
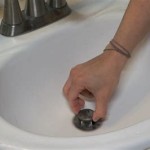
Once the water supply is turned off, you can remove the old sprayer. To do this, use an adjustable wrench to loosen the nut that holds the sprayer in place.
Once the nut is loose, you can pull the sprayer straight out of the sink.
4. Clean the Sink Surface
Before installing the new sprayer, it is important to clean the sink surface where the sprayer will be mounted.
Use a rag and some cleaner to wipe away any dirt or debris. This will help to ensure that the new sprayer will seal properly.
5. Apply Plumber's Putty
Once the sink surface is clean, you can apply a bead of plumber's putty around the base of the new sprayer.
Plumber's putty is a sealant that will help to prevent water from leaking out around the sprayer.
6. Install the New Sprayer
Now you can install the new sprayer. To do this, simply insert the sprayer into the hole in the sink and tighten the nut until it is snug.
Do not overtighten the nut, as this could damage the sprayer.
7. Turn On the Water Supply
Once the new sprayer is installed, you can turn on the water supply. Check for leaks around the sprayer. If you see any leaks, tighten the nut until the leak stops.
8. Test the Sprayer
Finally, test the sprayer to make sure it is working properly. Turn on the water and press the button on the sprayer. The water should spray out in a steady stream.
If the sprayer is not working properly, check the following:
- Make sure that the water supply is turned on.
- Make sure that the sprayer is properly installed.
- Make sure that the sprayer is not clogged.

How To Change A Kitchen Sink Spray

How To Replace Your Pull Out Sink Sprayer But Not The Hose Youtube

How To Replace A Sink Sprayer The Home

How To Fix A Sink Sprayer Leaking In The Kitchen Full Guide

How To Replace A Kitchen Sink Sprayer Faucet Attachment

How To Replace A Sink Sprayer The Home

Leaky Kitchen Sprayer Replacement Sink Repair Fix Danco Spray Universal

How To Replace A Broken Kitchen Sink Sprayer Exquisitely Unremarkable

Ask A Plumber Sink Sprayer Repair

Replace A Sink Sprayer