How to Replace Sink Trap
A sink trap is a U-shaped pipe that connects the sink to the drainpipe. It is designed to trap water, which creates a seal that prevents sewer gases from escaping into the home. Over time, the sink trap can become clogged with hair, soap scum, and other debris, which can lead to slow drainage and even backups. If your sink is draining slowly or backing up, it may be time to replace the trap.
Replacing a sink trap is a relatively simple plumbing repair that can be completed in about an hour. Here are the steps on how to replace a sink trap:
1. Gather Your Tools and Materials
You will need the following tools and materials to replace a sink trap:
* Adjustable wrench * Bucket * Plumber's putty * New sink trap * Screwdriver2. Turn Off the Water Supply
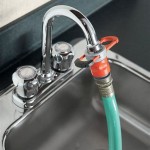
The first step is to turn off the water supply to the sink. There are typically two shut-off valves under the sink, one for the hot water and one for the cold water. Turn both valves clockwise to turn off the water.
3. Disconnect the Drainpipe
Once the water is turned off, you can disconnect the drainpipe from the sink. Use the adjustable wrench to loosen the nuts that hold the drainpipe in place. Be careful not to overtighten the nuts, as this can damage the drainpipe.
4. Remove the Old Sink Trap
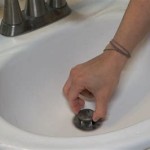
Once the drainpipe is disconnected, you can remove the old sink trap. Use the adjustable wrench to loosen the nuts that hold the trap in place. Be careful not to drop the trap, as it may contain water.
5. Clean the Drainpipe
Once the old trap is removed, you should clean the drainpipe. Use a rag or a brush to remove any debris that may be blocking the drain.
6. Apply Plumber's Putty
Before installing the new sink trap, you need to apply plumber's putty to the threads of the trap. Plumber's putty is a type of sealant that helps to create a watertight seal. Roll out a small piece of plumber's putty and then wrap it around the threads of the trap.
7. Install the New Sink Trap
Once the plumber's putty is in place, you can install the new sink trap. Hand-tighten the nuts that hold the trap in place and then use the adjustable wrench to tighten them further. Be careful not to overtighten the nuts, as this can damage the trap.
8. Reconnect the Drainpipe
Once the new sink trap is installed, you can reconnect the drainpipe. Hand-tighten the nuts that hold the drainpipe in place and then use the adjustable wrench to tighten them further. Be careful not to overtighten the nuts, as this can damage the drainpipe.
9. Turn On the Water Supply
Once the drainpipe is reconnected, you can turn on the water supply to the sink. Check for leaks around the sink trap and the drainpipe. If there are any leaks, tighten the nuts further.
10. Test the Sink
Once the water supply is turned on, you should test the sink to make sure it is draining properly. Run water into the sink and check for any leaks. If there are any leaks, tighten the nuts further.

How To Replace A Sink Trap Plumbing The Home

How To Fix Or Replace A Leaky Sink Trap Hometips

How To Replace A Sink Trap The Home

How To Replace S Trap With A P Drain Plumbing Traps Work Air Actuated Valve Install

How To Replace A Sink Drain P Trap Full Guide Fixed Today Plumbing

Easy Ways To Fix A Leaky Sink Trap 12 Steps With Pictures

How To Install P Trap And Bathroom Sink Drain Piping Easy Installation For Beginners Youtube

How To Install A P Trap Oatey

How To Replace A Kitchen Sink Basket Strainer Diy Family Handyman

How To Replace A Rusty Sink Drain Howtolou Com