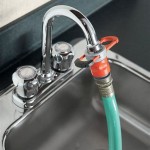
How To Replace Faucet In Sink
Replacing a faucet in your sink is a relatively easy task that can be completed in a few hours. By following these step-by-step instructions, you can save yourself the cost of hiring a plumber.
Step 1: Gather Your Tools and Materials
Before you begin, gather the following tools and materials:
- New faucet
- Adjustable wrench
- Basin wrench
- Plumber's putty
- Teflon tape
- Bucket
- Rags
Step 2: Turn Off the Water Supply
The first step is to turn off the water supply to your sink. This is usually done by turning the shut-off valves located under the sink. If you do not have shut-off valves, you will need to turn off the main water supply to your home.
Step 3: Disconnect the Old Faucet
Once the water supply is turned off, you can disconnect the old faucet. Use the adjustable wrench to loosen the nuts that hold the faucet in place. Be careful not to overtighten the nuts, as this can damage the faucet.
Once the nuts are loose, you can pull the old faucet out of the sink. Be sure to keep a bucket underneath the sink to catch any water that may leak out.
Step 4: Clean the Sink
Before you install the new faucet, take some time to clean the sink. This will help to ensure that the new faucet fits properly and does not leak.
Use a damp rag to wipe down the sink and remove any dirt or debris. You can also use a mild cleaner to clean the sink if necessary.
Step 5: Apply Plumber's Putty
Plumber's putty is a type of sealant that is used to prevent leaks around the base of the faucet. Before you install the new faucet, apply a thin bead of plumber's putty to the underside of the faucet base.
Step 6: Install the New Faucet
Once the plumber's putty is applied, you can install the new faucet. Insert the faucet into the hole in the sink and tighten the nuts that hold it in place. Be sure to tighten the nuts evenly to prevent leaks.
Step 7: Connect the Water Supply Lines
Once the faucet is installed, you can connect the water supply lines. Use the basin wrench to tighten the nuts that connect the water supply lines to the faucet. Be careful not to overtighten the nuts, as this can damage the water supply lines.
Step 8: Turn On the Water Supply
Once the water supply lines are connected, you can turn on the water supply to your sink. Check for leaks around the base of the faucet and the water supply lines. If you find any leaks, tighten the nuts that hold the faucet in place or the water supply lines.
Step 9: Enjoy Your New Faucet
Once you have installed the new faucet and turned on the water supply, you can enjoy your new faucet. Be sure to clean the faucet regularly to keep it looking its best.

How To Replace A Kitchen Sink Faucet

Diy How To Replace And Install A Bathroom Sink Faucet

Diy How To Replace A Bathroom Sink Faucet Remove Install

How To Replace A Kitchen Faucet

How To Change A Kitchen Faucet Family Handyman

How To Replace A Bathroom Faucet Removal And Installation

How To Replace A Kitchen Faucet Youtube

How To Replace A Bathroom Faucet Removal And Installation

How To Replace A Bathroom Faucet Home Repair Tutor

How To Replace A Kitchen Faucet For Newbies Anika S Diy Life