How To Repair A Crack In A Porcelain Sink
A cracked porcelain sink is an unsightly nuisance that can lead to further damage if left untreated. While a severe crack may necessitate a full sink replacement, minor cracks and chips can often be repaired effectively with readily available materials and a bit of patience. This article provides a comprehensive guide to repairing these smaller imperfections, restoring your sink to its former glory.
1. Assessing the Damage
Before beginning any repair, it is crucial to thoroughly assess the damage. Examine the crack's length, depth, and location. Superficial scratches can often be buffed out with a mild abrasive, while deeper cracks require more intensive treatment. If the crack penetrates completely through the porcelain, compromising the sink's structural integrity, professional repair or replacement is likely the best option. For hairline cracks and minor chips, DIY repair is often feasible.
2. Gathering the Necessary Materials
Proper preparation is key to a successful repair. Gather the following materials before starting:
- Porcelain repair kit (epoxy-based is recommended)
- Acetone or rubbing alcohol
- Fine-grit sandpaper (e.g., 400-grit)
- Masking tape
- Razor blade or utility knife
- Cotton swabs
- Gloves
- Safety glasses
3. Preparing the Surface
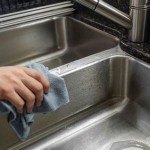
Thoroughly clean the area around the crack with a mixture of warm water and mild dish soap. Rinse well and allow the area to dry completely. Once dry, use acetone or rubbing alcohol to remove any lingering grease or residue. This ensures optimal adhesion of the repair material. Apply masking tape around the crack to protect the surrounding porcelain from accidental damage during the repair process.
4. Applying the Porcelain Repair Compound
Most porcelain repair kits contain a two-part epoxy compound. Carefully follow the manufacturer's instructions for mixing the components. Using a small applicator (often included in the kit), carefully apply the epoxy compound to the crack, ensuring it fills the entire crevice. Overfill slightly, as the compound will shrink during the curing process. For deeper chips, consider applying the epoxy in thin layers, allowing each layer to partially cure before applying the next. This helps prevent air bubbles and ensures a stronger bond.
5. Smoothing and Finishing the Repair
Once the epoxy is applied, use a razor blade or utility knife to carefully scrape away any excess compound, leveling the surface with the surrounding porcelain. Be meticulous to avoid scratching the surrounding area. After the excess epoxy is removed, allow the compound to cure according to the manufacturer’s instructions. This typically takes several hours. Avoid using the sink during the curing period.
6. Sanding and Polishing
After the epoxy has fully cured, use fine-grit sandpaper (400-grit or higher) to carefully sand the repaired area until it is flush with the surrounding porcelain. Sand gently, using circular motions, to avoid creating additional scratches. Periodically wipe the area with a damp cloth to remove sanding dust and assess the smoothness. Continue sanding until any imperfections are removed and the surface is smooth to the touch. Some repair kits include a polishing compound. If available, apply this according to the manufacturer’s instructions to achieve a high-gloss finish and blend the repair seamlessly with the surrounding porcelain.
7. Post-Repair Care
Once the repair is complete and the surface is polished, remove the masking tape. To prolong the life of the repair and maintain the appearance of your sink, avoid harsh abrasive cleaners in the repaired area. Opt for mild, non-abrasive cleaners and soft sponges or cloths to prevent scratching the repaired surface. Regularly cleaning the sink and avoiding impacts to the repaired area will help maintain the integrity of the repair for an extended period.

How To Fix A Crack In Porcelain Sink Youtube

How To Patch A Porcelain Sink Crack Himg Surface Repair

How To Fix A Cracked Porcelain Sink Hometalk

How To Fix A Chipped Porcelain Sink

How To Fix Chipped Porcelain Ceramic Sink Or Bath Tub With Milliput Epoxy Putty

How To Fix A Cracked Porcelain Sink 8 Steps Prudent Reviews

I Have A Huge Crack In My Porcelain Sink What S The Best Way To Fix Hometalk

How To Fix A Cracked Porcelain Sink 8 Steps Prudent Reviews

What Are The Benefits Of A Ceramic Sink Repair Foreman Snags

How To Repair A Hairline Crack In Porcelain Sink 6 Simple Steps Follow