How To Install Apron Sink
Installing an apron sink, also known as a farmhouse sink, can add a touch of rustic charm to any kitchen. While the process may seem daunting, it is actually quite straightforward with a little planning and preparation. Here is a step-by-step guide on how to install an apron sink:
1. Gather Your Materials:
Before you begin, make sure you have all the necessary materials. You will need:
- Apron sink
- Sink base cabinet
- Sink clips
- Level
- Measuring tape
- Caulk gun and caulk
- Plumber's putty
- Wrench
2. Remove the Old Sink:
If you are replacing an existing sink, you will need to remove it first. To do this, turn off the water supply to the sink and disconnect the water lines. Use a wrench to loosen the nuts that are holding the sink in place. Carefully lift the sink out of the cabinet and set it aside.
3. Prepare the Cabinet:
Once the old sink is removed, you need to prepare the cabinet for the new sink. If the cabinet is not already fitted with a sink base, you will need to install one. A sink base is a piece of wood that is cut to fit the shape of the sink and provides support. Place the sink base in the cabinet and secure it with screws.
4. Position the Sink:
Carefully lift the sink into the cabinet and position it so that it is centered. Use a level to make sure that the sink is level from front to back and side to side. Once the sink is level, secure it to the cabinet using the sink clips.
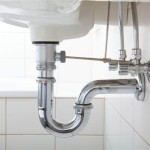
5. Connect the Water Lines:
Once the sink is secured, you can connect the water lines. Apply a small amount of plumber's putty to the threads of the water supply lines and then screw them into the sink. Turn on the water supply and check for leaks.
6. Caulk the Sink:
To prevent leaks, you need to caulk the sink around the edges. Apply a bead of caulk around the perimeter of the sink, where it meets the countertop. Use your finger or a caulk tool to smooth out the caulk and remove any excess.
7. Install the Drain:
Insert the drain into the sinkhole and tighten the nuts until the drain is secure. Apply a bead of caulk around the base of the drain and smooth it out.
8. Finishing Touches:
Once the caulk is dry, you can install the faucet and any other accessories. Wipe down the sink with a damp cloth to remove any fingerprints or smudges. Your new apron sink is now installed and ready to use.

How To Install A Farmhouse Sink

How To Install A Farmhouse Sink Diy Kitchen Remodel Youtube

Fireclay Farmhouse Kitchen Sink Installation Guide

How To Install An Apron Sink In A Stock Cabinet Pneumatic Addict

Farmhouse Sink Installation Easy Diy Top Mount Do Dodson Designs

How To Install A Farmhouse Sink Hometips

Our Apron Front Sink Install Sinkology

Diy Farmhouse Sink Install Undermount Zuhne Stainless Steel Youtube

How To Install A Farmhouse Sink

Installing A Kohler Whitehaven Sink Bright Green Door