How To Fit An Undermount Sink
Undermount sinks are becoming increasingly popular due to their sleek and modern look. They are also easier to clean than traditional top-mount sinks, as there is no lip for food and debris to collect on.
Fitting an undermount sink is not difficult, but it does require some careful planning and preparation.
Tools and materials you will need:
* Undermount sink * Measuring tape * Pencil * Jigsaw * Sander * Caulking gun * Silicone caulk * Plumber's putty * Basin wrench * Adjustable wrench * ScrewdriverStep 1: Measure and mark the countertop
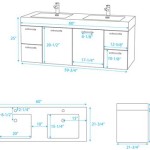
The first step is to measure and mark the countertop where you want to install the sink. Use a measuring tape to measure the width and depth of the sink, then mark the location on the countertop using a pencil.
Step 2: Cut the countertop
Once you have marked the location of the sink, use a jigsaw to cut out the hole for the sink. Be sure to cut the hole slightly smaller than the sink, so that the sink will fit snugly in the hole.
Step 3: Sand the countertop
Once you have cut the hole for the sink, use a sander to smooth the edges of the hole. This will help to ensure that the sink fits flush against the countertop.
Step 4: Apply caulk to the sink
Before you install the sink, apply a bead of silicone caulk around the edge of the sink. This will help to seal the sink and prevent water from leaking out.
Step 5: Install the sink
Once you have applied caulk to the sink, carefully lift the sink into the hole in the countertop. Center the sink in the hole and press down firmly to secure it in place.
Step 6: Tighten the sink clamps
Once the sink is in place, tighten the sink clamps to secure it to the countertop. Be sure to tighten the clamps evenly to prevent the sink from cracking.
Step 7: Apply plumber's putty to the drain
Before you connect the drain, apply a ring of plumber's putty to the drain flange. This will help to seal the drain and prevent water from leaking out.
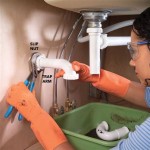
Step 8: Connect the drain
Once you have applied plumber's putty to the drain, connect the drain to the sink. Use a basin wrench to tighten the nuts on the drain.
Step 9: Connect the water supply
Finally, connect the water supply to the sink. Use an adjustable wrench to tighten the nuts on the water supply lines.
Your undermount sink is now installed and ready to use!

3 Simple Ways To Install An Undermount Sink Wikihow

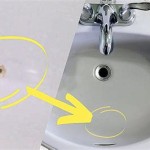
How I Fit An Undermount Sink For Easy Maintenance

How To Install Undermount Kitchen Sinks Concrete Countertop Institute

3 Simple Ways To Install An Undermount Sink Wikihow

How To Install Undermount Kitchen Sinks Concrete Countertop Institute

3 Simple Ways To Install An Undermount Sink Wikihow

An Easier Way To Install A Ceramic Undermount Kitchen Sink

How To Support Undermount Sinks

How Do You Install Undermount Sinks Marble Com

Under Mount Sink Disaster What Would Do