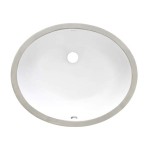
How Do You Install An Undermount Kitchen Sink
Installing an undermount kitchen sink can be a great way to update the look of your kitchen and make it more functional. Undermount sinks are mounted below the countertop, which gives them a sleek, modern look. They are also easier to clean than top-mount sinks because there is no lip around the edge of the sink to catch crumbs and dirt. However, installing an undermount sink can be a bit more challenging than installing a top-mount sink. Here are the steps on how to do it.
1. Remove the old sink
The first step is to remove the old sink. If you are replacing a top-mount sink, you can simply remove the caulk around the edge of the sink and lift it out. If you are replacing an undermount sink, you will need to first remove the countertop. To do this, use a utility knife to cut the caulk around the edge of the countertop. Then, use a pry bar to carefully pry the countertop up. Once the countertop is removed, you can remove the undermount sink by unscrewing the mounting brackets.
2. Prepare the countertop
Once the old sink is removed, you need to prepare the countertop for the new sink. If you are installing an undermount sink, you will need to create a template for the sink. To do this, trace the outline of the sink onto a piece of paper. Then, add 1/2 inch to all sides of the outline. This will be the size of the hole that you need to cut in the countertop. Use a jigsaw to cut the hole in the countertop. Once the hole is cut, you need to sand the edges of the hole until they are smooth.
3. Install the mounting brackets
The next step is to install the mounting brackets. The mounting brackets will support the sink and keep it in place. The type of mounting brackets that you need will depend on the type of sink that you are installing. Follow the manufacturer's instructions for installing the mounting brackets.
4. Apply caulk
Once the mounting brackets are installed, you need to apply caulk around the edge of the hole in the countertop. The caulk will help to seal the sink and prevent water from leaking out. Use a caulk gun to apply the caulk. Be sure to apply the caulk evenly around the edge of the hole.
5. Set the sink in place
The next step is to set the sink in place. Carefully lift the sink into place and align it with the hole in the countertop. Once the sink is in place, press down on it to secure it. Be sure to check that the sink is level.
6. Connect the plumbing
The next step is to connect the plumbing to the sink. The plumbing will vary depending on the type of sink that you are installing. Follow the manufacturer's instructions for connecting the plumbing.
7. Install the countertop
Once the plumbing is connected, you can install the countertop. Carefully lift the countertop into place and align it with the base cabinets. Once the countertop is in place, press down on it to secure it. Be sure to check that the countertop is level.
8. Finish the installation
The final step is to finish the installation. This includes installing the faucet, handles, and any other accessories. Follow the manufacturer's instructions for installing these components. Once the installation is complete, you can enjoy your new undermount kitchen sink.

How To Install Undermount Kitchen Sinks Concrete Countertop Institute

How To Replace And Install An Undermount Sink Youtube

How To Install An Undermount Kitchen Sink On A Granite Countertop Youtube

How To Install Undermount Kitchen Sinks Concrete Countertop Institute

How To Install An Undermount Sink

How I Fit An Undermount Sink For Easy Maintenance

Undermount Sink Installation A Step By Guide

How To Install A Stainless Steel Undermount Kitchen Sink Moen Installation

3 Simple Ways To Install An Undermount Sink Wikihow

Your Complete Guide To The Undermount Sink


