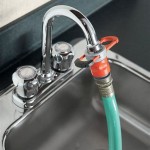
How To Remove A Kitchen Sink Faucet
Removing a kitchen faucet is a common plumbing task that homeowners can often tackle themselves. This process typically involves several key steps to ensure the faucet is removed correctly without causing damage to the sink or surrounding areas. Having the necessary tools readily available will simplify the project and make the removal process smoother.
Essential Tools and Materials
Gathering the appropriate tools and materials beforehand will streamline the faucet removal process. These items typically include:
- Basin wrench
- Adjustable wrench
- Channel-lock pliers
- Screwdrivers (Phillips and flathead)
- Putty knife
- Penetrating oil
- Bucket or container
- Towels or rags
- Safety glasses
Turning Off the Water Supply
Before beginning any work on the faucet, it's crucial to shut off the water supply to prevent leaks and potential flooding. Locate the shut-off valves under the sink. These valves control the hot and cold water lines to the faucet. Turn both valves clockwise until they are completely closed. Turn on the faucet to confirm the water supply is off and drain any residual water into a bucket or container.
Disconnecting the Water Supply Lines
With the water supply off, disconnect the water supply lines from the faucet's tailpieces. Use an adjustable wrench or channel-lock pliers to loosen the nuts connecting the supply lines to the tailpieces. Have a bucket or container handy to catch any remaining water in the lines. The nuts may be tight due to corrosion or mineral buildup, so penetrating oil can be helpful if they are difficult to loosen.
Removing the Sprayer Hose (if applicable)
If the faucet has a pull-out or pull-down sprayer, the sprayer hose needs to be disconnected. Locate the connection point, typically under the sink, where the hose attaches to the faucet body. Use an adjustable wrench or pliers to loosen and disconnect the hose. Be prepared for some water to drip from the hose.
Detaching the Faucet Mounting Hardware
Kitchen faucets are typically secured to the sink using mounting hardware located beneath the sink. This hardware often includes nuts, washers, and a mounting plate. Access the mounting hardware from under the sink. Depending on the faucet model, a basin wrench may be necessary due to limited space. Loosen and remove the nuts securing the faucet to the sink. It may be necessary to support the faucet from above while removing the nuts to prevent it from dropping.
Removing the Faucet from Above the Sink
Once the mounting hardware is removed, carefully lift the faucet out from above the sink. The faucet may require some gentle wiggling or twisting to break free from any sealant used during installation. Be careful not to scratch the sink surface during removal. If the faucet is particularly stubborn, applying penetrating oil to the base can help loosen it.
Cleaning the Sink Surface
After removing the faucet, clean the sink surface to remove any old sealant, putty, or debris. A putty knife is helpful for scraping away old sealant. Thoroughly clean the area where the new faucet will be installed to ensure a proper seal. Cleaners specifically designed for sink materials, such as stainless steel or porcelain, are recommended.
Dealing with Stubborn Connections
Sometimes connections and fittings can be difficult to remove due to corrosion or mineral buildup. In such cases, applying penetrating oil and allowing it to soak for several minutes can help loosen the connection. Repeated applications may be necessary. Using a basin wrench or a specialized faucet socket wrench can provide additional leverage and grip for stubborn nuts. If the connections are still difficult to remove, consulting a professional plumber is recommended.
Protecting the Sink Drain
While working under the sink, it's advisable to cover the drain opening with a rag or plug to prevent small parts, such as screws or washers, from falling down the drain. This simple step can save time and frustration later on. Additionally, make sure the garbage disposal switch is turned off to prevent accidental activation while working in the area.

How To Remove A Kitchen Faucet The Home

How To Replace A Kitchen Sink Faucet

How To Remove A Kitchen Faucet Mounting Nut

How To Replace A Kitchen Faucet Beginner S Guide The Handyman Daughter

How To Replace A Kitchen Faucet For Newbies Anika S Diy Life

How To Replace A Kitchen Faucet

How To Remove And Install A Kitchen Sink Faucet Moen Georgene 87912srs

How To Replace A Kitchen Faucet Young House Love

How To Install A Kitchen Faucet Lowe S

How To Remove A Kitchen Faucet The Home