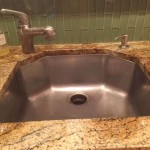
Kitchen Sink Leaking From Handle
A dripping kitchen sink handle can range from a minor annoyance to a significant plumbing issue. Ignoring a leaky faucet handle not only wastes water and increases utility bills but can also lead to more serious problems like corrosion and water damage. Understanding the potential causes and solutions for this common plumbing problem can empower homeowners to address the issue promptly and effectively.
1. Identifying the Type of Faucet
Before attempting any repairs, it is crucial to identify the type of kitchen faucet. The most common types include compression faucets, ball faucets, cartridge faucets, and ceramic disc faucets. Each type has a unique internal mechanism, and understanding the specific design will guide the troubleshooting and repair process. Compression faucets have separate hot and cold water handles and typically use rubber washers to control water flow. Ball faucets have a single handle that controls both temperature and flow, using a ball-shaped valve. Cartridge faucets also use a single handle and rely on a cartridge containing all the working parts. Ceramic disc faucets, known for their durability, utilize two ceramic discs to control water flow and temperature.
2. Common Causes of Leaks
Several factors can contribute to a kitchen sink handle leaking. One of the most common culprits is a worn-out O-ring. These small rubber rings create a watertight seal around the handle and stem. Over time, they can become brittle or cracked, leading to leaks. Another potential cause is a corroded valve seat. The valve seat is the area where the O-ring sits, and corrosion can prevent a proper seal. In cartridge faucets, a damaged cartridge can be the source of the leak. For ball faucets, a worn-out ball or cam assembly can cause leaks around the handle.
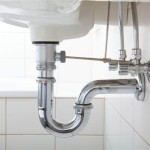
3. Gathering Necessary Tools and Materials
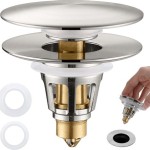
Proper preparation is essential for a successful repair. Gathering the necessary tools and materials beforehand will streamline the process. Commonly required tools include an adjustable wrench, Phillips head screwdriver, flathead screwdriver, and pliers. Depending on the faucet type and the specific issue, replacement parts such as O-rings, cartridges, or valve seats may be needed. It's also recommended to have a basin wrench for accessing difficult-to-reach nuts under the sink.
4. Step-by-Step Repair for a Compression Faucet
For a compression faucet, begin by shutting off the water supply to the sink. Next, use a flathead screwdriver to pry off the decorative cap on the handle. Remove the handle screw using a Phillips head screwdriver, and then lift off the handle. Use an adjustable wrench to loosen and remove the packing nut. Inspect the O-ring and stem for wear and tear. Replace any damaged components. Reassemble the faucet in reverse order, ensuring all parts are tightened securely.
5. Step-by-Step Repair for a Ball Faucet
Repairing a ball faucet involves a similar process. After shutting off the water supply and removing the handle, loosen and remove the adjusting ring and cap. Carefully lift out the cam, packing, and rotating ball. Inspect these components for damage and replace if necessary. Reassemble the faucet, ensuring the ball is correctly positioned and all components are tightened securely. Turn the water supply back on slowly to check for leaks.
6. Step-by-Step Repair for a Cartridge Faucet
Cartridge faucets often require replacing the entire cartridge assembly. After shutting off the water supply and removing the handle, use pliers to remove the retaining clip holding the cartridge in place. Pull out the old cartridge and install the new one, ensuring it is seated correctly. Replace the retaining clip and reassemble the handle. Turn the water supply back on to test for leaks.
7. Seeking Professional Assistance
While many leaky handle repairs can be handled by homeowners, some situations may necessitate professional assistance. If the leak persists after attempting repairs, or if the underlying cause is unclear, it is advisable to contact a qualified plumber. A plumber has the expertise and specialized tools to diagnose and resolve complex plumbing problems effectively, preventing further damage and ensuring a properly functioning kitchen sink.

How To Fix A Leaky Faucet With Single Handle Design

Sealing A Leaky Faucet Base Plate 1 Tom Plumber

Why Is Pull Down Kitchen Faucet Leaking At Handle Arcora Faucets

Stop Faucet Handle Leaking How To Replace A Kitchen Valve

Plumbing How To Fix A Small Faucet Leak At The Base Home Improvement Stack Exchange

Faucet Repair How To A Dripping Kitchen Two Handle

How To Fix A Kitchen Faucet Leaking From The Handle Taskrabbit Blog
.webp?strip=all "How To Fix A Leaky Faucet Handle Step By Guide")
How To Fix A Leaky Faucet Handle Step By Guide

How To Fix A Leaky Faucet Handle Beginner Friendly Guide

Two Handle Kitchen Sink Faucet Leak Repair