How to Repair a Leaking Sink Faucet
A leaky faucet is a common household problem that can be annoying and wasteful. It can also lead to more serious issues, such as water damage to your cabinets or floors. Fortunately, repairing a leaky faucet is a relatively simple task that most homeowners can handle themselves. This article will guide you through the process of identifying the source of the leak and provide step-by-step instructions for fixing it.
Identifying the Source of the Leak
The first step in repairing a leaky faucet is to determine the source of the leak. There are several possible causes, including a worn-out washer, a damaged O-ring, a loose packing nut, or a corroded cartridge.
To pinpoint the exact location of the leak, observe the following:
- Dripping from the spout: This typically indicates a worn-out washer or a loose packing nut.
- Leak at the base of the faucet: This could be due to a damaged O-ring or a loose packing nut.
- Leak from the handle area: This often points to a worn-out cartridge or a loose handle.
Once you have identified the source of the leak, you can move on to the next step, which is gathering the necessary tools and parts.
Gathering Tools and Parts
Before you begin the repair process, gather the following tools and parts:
- Adjustable wrench: For tightening and loosening nuts and bolts.
- Channel-lock pliers: For gripping and turning objects.
- Phillips screwdriver: For removing screws.
- Flat-head screwdriver: For prying off faucet caps.
- Replacement parts: Depending on the type of faucet and the source of the leak, you may need to replace the washer, O-ring, packing nut, cartridge, or other components.
- Plumber's tape: For sealing threaded connections.
- Bucket: For catching any drips or spills.
- Rag: For wiping up spills and keeping your work area clean.
Repairing a Leaky Faucet
The specific steps for repairing a leaky faucet will vary depending on the type of faucet and the source of the leak. However, the following general steps can be applied to most repairs:
- Turn off the water supply: Locate the shut-off valve for your sink and turn it off completely.
- Drain the faucet: Open the faucet to allow any remaining water to drain out. This will prevent a sudden rush of water when you start working on the faucet.
- Remove the faucet handle: Use a flat-head screwdriver to remove the cap that covers the faucet handle screw. Then, use a Phillips screwdriver to remove the screw and detach the handle.
- Remove the faucet stem: Depending on the type of faucet, you may need to use a wrench or pliers to remove the stem nut that holds the stem in place. Once the stem is out, you can inspect the washer and O-ring for wear or damage.
- Replace the worn parts: Replace any worn-out washers, O-rings, or other components. If the packing nut is loose, tighten it securely.
- Reassemble the faucet: Put the faucet stem back in place and tighten the nut securely. Replace the handle and screw it back into place.
- Turn on the water supply: Carefully turn the water supply back on and check for leaks.
If you find that the leak persists even after replacing the worn parts, you may need to replace the entire faucet cartridge. In this case, refer to the manufacturer's instructions for your specific faucet model.
Tips for Maintaining Your Faucet
Here are some tips for preventing future leaks and maintaining your faucet:
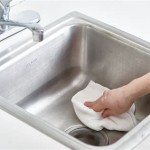
- Clean your faucet regularly: Wipe down your faucet with a soft cloth and mild soap to remove dirt, grime, and mineral deposits.
- Tighten loose nuts and bolts: Over time, nuts and bolts can loosen, leading to leaks. Check these connections regularly and tighten them as needed.
- Replace worn parts promptly: Don't delay replacing washers, O-rings, or other worn parts. This will help prevent more serious problems from developing.
By following these simple steps, you can easily repair a leaky faucet and prevent further water damage. If you are unsure about any part of the repair process, it is always best to consult a qualified plumber.

Properly Fixing A Leaky Sink Faucet Wallside Windows

How To Fix A Dripping Or Leaky Double Handle Faucet

How To Fix A Leaky Faucet Guides For Every Design And Style

How To Fix A Leaky Faucet The Home

5 Reasons Your Faucet Is Dripping Water How To Fix It

Fix A Leaky Bathroom Faucet Replace Cartridge Quick Easy Home Repair

12 Ways To Stop A Leaking Faucet Beyond Wow Plumbing

How To Fix A Leaky Faucet Guides For Every Design And Style

How To Fix A Leaky Faucet True Value Hardware

How To Fix A Leaky Faucet The Home