Bathroom Sink Backsplash 24 Inch
A 24-inch bathroom sink backsplash offers a practical and stylish solution for protecting walls from water damage while enhancing the aesthetic appeal of the vanity area. Selecting the appropriate backsplash involves careful consideration of material, design, and installation requirements. This article explores various aspects of 24-inch bathroom sink backsplashes, offering insights to aid in informed decision-making.
Material Selection for a 24-Inch Backsplash
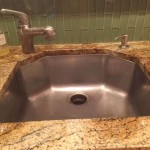
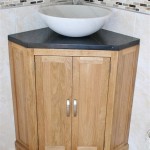
The choice of material significantly impacts the backsplash's durability, maintenance requirements, and overall look. Popular options include ceramic and porcelain tiles, natural stone, glass, and composite materials. Ceramic and porcelain offer affordability and a wide array of colors and patterns. Natural stone, such as granite or marble, provides a luxurious feel but requires sealing and more specialized care. Glass offers a sleek, modern aesthetic and is easy to clean. Composite materials, like quartz, combine the durability of natural stone with engineered consistency and low maintenance.
When selecting a material, consider the existing bathroom decor. A cohesive look can be achieved by coordinating the backsplash with the countertop, flooring, or wall color. The level of maintenance required should also be a factor. Busy households may benefit from the low-maintenance nature of ceramic, porcelain, or glass, while those willing to invest more time in upkeep might opt for the natural beauty of stone.
Design Considerations for a 24-Inch Backsplash
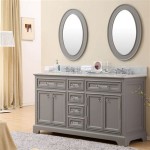
A 24-inch backsplash provides ample space for design creativity. While a simple, continuous surface is a classic choice, various patterns and textures can add visual interest. Subway tiles offer a timeless appeal, while mosaic tiles allow for intricate designs and vibrant color combinations. Consider using contrasting grout colors to highlight the tile shape and add depth.
The height of the backsplash is another design element to consider. A standard height of 4 inches provides adequate protection against splashes, but extending the backsplash higher can create a more dramatic look and further protect the wall, especially behind a taller faucet. Full-height backsplashes that reach the mirror or medicine cabinet offer a seamless, cohesive design.
The existing bathroom lighting should be evaluated when selecting the backsplash design. Glossy surfaces reflect light, making the space appear brighter, while matte finishes offer a more subdued ambiance. Darker colors absorb light, while lighter colors reflect it, impacting the overall perception of the bathroom size.
Installation Process for a 24-Inch Backsplash
Proper installation is crucial for a durable and aesthetically pleasing backsplash. Surface preparation is the first step. Ensure the wall is clean, dry, and level. Any existing wallpaper or damaged paint should be removed. For tile installations, applying a waterproof membrane is essential to prevent moisture damage.
Adhesive selection depends on the chosen backsplash material. Thin-set mortar is commonly used for tile, while specialized adhesives are required for other materials like stone or glass. Applying the adhesive evenly and using spacers ensures consistent grout lines. After the adhesive cures, grout is applied to fill the gaps between the tiles, providing a finished look and preventing water from seeping behind the backsplash.
For DIY installations, carefully follow the manufacturer's instructions for the chosen material and adhesive. Complex designs or challenging materials might require professional installation to ensure a quality finish and avoid potential issues. Properly sealing the backsplash after installation, particularly for natural stone, helps protect it from stains and water damage, extending its lifespan.
Measuring accurately is paramount for a successful installation. Double-check measurements before cutting any material. For intricate cuts around outlets or fixtures, specialized tools like a tile saw or wet saw may be necessary. Dry fitting the backsplash before applying adhesive allows for adjustments and ensures a proper fit.
Protecting adjacent surfaces during installation is essential. Covering the countertop and sink with a drop cloth prevents damage from adhesive or grout. Using painter's tape along the edges of the backsplash area helps create clean lines and simplifies cleanup.
Choosing a 24-inch bathroom sink backsplash involves considering the material, design, and installation requirements. Careful planning and execution will result in a functional and visually appealing addition to the bathroom, enhancing its overall style and protecting the walls from moisture damage for years to come.

Elegant Lighting Bs1124cw Backsplash 24 X 1 4 Inch Calacatta White Bathroom Vanity

Elegant Lighting Bs1224cra Backsplash 24 X 1 4 Inch Carrara White Bathroom Vanity

Elegant Lighting Bs1124cw Backsplash 24 X 1 4 Inch Calacatta White Bathroom Vanity

Timeless Home 24 In W Engineered Stone Vanity Backsplash Ivory White Thbs2048vw The

Timeless Home 24 In W Engineered Stone Vanity Backsplash Ivory White Thbs2048vw The

24 Inch Single Bathroom Vanity In Concrete Grey With Backsplash

Unique Bathroom Vanity Backsplash Ideas Glass Stone Ceramic Tile

Do Bathroom Vanities Need A Backsplash

Rachal 24 50 Single Bathroom Vanity Backsplash No Mounting Bracket

24 5 In W Cultured Marble Vanity Backsplash White