Installing Drain In Kitchen Sink
Installing a drain in a kitchen sink is a relatively simple plumbing project that can be completed in a few hours. By following these steps, you can easily install a new drain and get your sink up and running again.
Materials You'll Need
- New kitchen sink drain
- Plumber's putty
- Adjustable wrench
- Phillips head screwdriver
- Putty knife
- Flashlight
- Bucket
Step 1: Remove the Old Drain
Start by turning off the water supply to the sink. Then, use an adjustable wrench to loosen the nuts that hold the old drain in place. Be careful not to overtighten the nuts, as this can damage the sink.
Once the nuts are loose, you can remove the old drain by pulling it straight up. If the drain is stuck, you can use a putty knife to gently pry it loose.
Step 2: Clean the Drain Hole
Once the old drain is removed, you need to clean the drain hole. Use a flashlight to inspect the hole for any debris or build-up. If there is any debris, you can remove it with a putty knife.
Once the drain hole is clean, you can apply a bead of plumber's putty around the edge of the hole. The plumber's putty will help to seal the drain and prevent leaks.
Step 3: Install the New Drain
Now you can install the new drain. Place the drain in the hole and press down firmly to seat it in the plumber's putty. Then, use an adjustable wrench to tighten the nuts that hold the drain in place. Be sure to tighten the nuts evenly to prevent leaks.
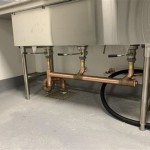
Step 4: Connect the Drain to the P-Trap
Once the drain is installed, you need to connect it to the P-trap. The P-trap is a U-shaped pipe that helps to prevent sewer gases from entering the sink. To connect the drain to the P-trap, you will need to use a slip nut and a washer.
Start by placing the washer on the end of the drain. Then, thread the slip nut onto the drain and tighten it by hand. Finally, use an adjustable wrench to tighten the slip nut further. Be sure to not overtighten the slip nut, as this can damage the drain or the P-trap.
Step 5: Test the Drain
Once the drain is connected to the P-trap, you can test it to make sure there are no leaks. Turn on the water supply to the sink and let the water run for a few minutes. Check for any leaks around the drain or the P-trap. If you see any leaks, you can tighten the nuts or slip nuts further.
If the drain is not leaking, then you have successfully installed a new drain in your kitchen sink. Congratulations!

How To Install A Kitchen Sink Drain

How To Install A Kitchen Sink Drain With Pictures Wikihow

How To Replace A Kitchen Sink Basket Strainer Diy Family Handyman

How To Install Kitchen Sink Drain Strainer Stop Leaks

How To Install A Kitchen Sink Drain

How To Replace A Kitchen Sink Strainer Drain Install Diy New Homeowner Youtube

How To Install A Kitchen Sink Drain With Pictures Wikihow

How To Replace A Kitchen Sink Strainer

Kitchen Sink Plumbing How To Make A Drain Better

How To Fix Or Replace A Leaky Sink Trap Hometips