Installing A Utility Sink To Existing Plumbing
Installing a utility sink to existing plumbing can be a relatively simple and straightforward task, provided that you have the right tools and materials. By following these step-by-step instructions, you can have your new sink up and running in no time.
Tools and Materials You'll Need:
- Utility sink
- Faucet
- P-trap
- Sink drain
- Supply lines
- Wrench
- Screwdriver
- Plumber's putty
- Teflon tape
- Level
Step 1: Prepare the Sink Base
Locate the desired location for your utility sink. Ensure that there is sufficient space for the sink and its components underneath. Secure the sink base to the wall studs using screws. Use a level to ensure that the base is level.
Step 2: Install the Faucet
Apply a bead of plumber's putty around the base of the faucet. Insert the faucet into the hole in the sink and hand-tighten the mounting nuts. Use a wrench to fully tighten the nuts, but avoid overtightening.
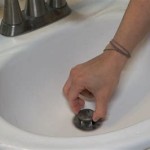
Step 3: Install the Sink Drain
Apply a bead of plumber's putty around the base of the sink drain. Insert the drain into the hole in the sink and hand-tighten the mounting nuts. Use a wrench to fully tighten the nuts.
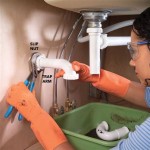
Step 4: Connect the P-Trap
Attach the P-trap to the sink drain using a slip nut. Hand-tighten the nut and then use a wrench to fully tighten it. Ensure that the P-trap is properly aligned to allow for proper drainage.
Step 5: Connect the Supply Lines
Connect the hot and cold water supply lines to the faucet using compression fittings. Apply Teflon tape to the threads of each fitting before connecting it to the faucet. Use a wrench to hand-tighten the fittings and then tighten them further using a wrench.
Step 6: Test the Sink
Turn on the water supply and check for any leaks. Inspect all connections to ensure that they are secure. If there are any leaks, tighten the fittings accordingly. Once you are satisfied with the tightness of all connections, run the water for a few minutes to flush out any debris from the lines.
Step 7: Secure the Sink
Apply a bead of silicone caulk around the edges of the sink where it meets the base. This will help to seal the sink and prevent water damage. Allow the caulk to dry completely before using the sink.
Congratulations! You have now successfully installed a utility sink to your existing plumbing. Enjoy the convenience of having a dedicated water source for your laundry, gardening, or other household tasks.

How To Install A Utility Sink With Pictures Wikihow

How To Install A Utility Sink With Pictures Wikihow

Plumbing For Utility Sink In Garage Diy Home Improvement Forum

Connect Laundry Sink Drain To Washer Standpipe Doityourself Com Community Forums

How To Plumb Laundry Sink And Washer Diy Home Improvement Forum

Learn How To Install New Sink Drain Line In Existing Home Using Wet Vents Plumbing Examples

Connect Laundry Sink Drain To Washer Standpipe Doityourself Com Community Forums

Plumbing Using A Single Pipe Off The Main Drain For Washer And Utility Sink Venting Home Improvement Stack Exchange

Adding Laundry Sink To Washer Drain Vent Diy Home Improvement Forum

Learn How To Install New Sink Drain Line In Existing Home Using Wet Vents Plumbing Examples Youtube