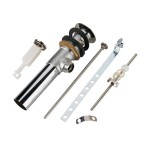
How To Change Out A Kitchen Sink
Is your kitchen sink old, rusty, or damaged? Replacing it is a relatively simple DIY project that can be completed in a few hours. Here’s a step-by-step guide on how to change out a kitchen sink:
1. Gather Your Tools and Materials
Before you start, gather the following tools and materials:
- New kitchen sink
- Sink strainer
- Plumber's putty
- Teflon tape
- Adjustable wrench
- Channel locks
- Screwdriver
- Utility knife
- Bucket
- Measuring tape
- Level
2. Turn Off the Water Supply
Before you do anything else, turn off the water supply to your sink. There will be two valves under the sink, one for hot water and one for cold water. Turn both valves clockwise to close them.
3. Disconnect the Water Lines
Once the water is turned off, disconnect the water lines from the sink. Use an adjustable wrench to loosen the nuts that connect the lines to the sink. Be careful not to overtighten the nuts.
4. Disconnect the Drain
Next, disconnect the drain from the sink. There will be a large nut that connects the drain to the sink. Use channel locks to loosen the nut and remove the drain.
5. Remove the Old Sink
Once the water lines and drain are disconnected, you can remove the old sink. First, remove any screws that are holding the sink in place. Then, carefully lift the sink out of the countertop.
6. Clean the Countertop
Before you install the new sink, clean the countertop thoroughly. Remove any old caulk or sealant, and wipe the countertop down with a damp cloth.
7. Install the New Sink
Now it’s time to install the new sink. First, apply a bead of plumber's putty around the rim of the sink. Then, carefully place the sink in the countertop and press down firmly. Use a level to make sure that the sink is level.
8. Connect the Drain
Next, connect the drain to the sink. Apply a bead of plumber's putty around the base of the drain and then insert the drain into the sink. Tighten the nut that holds the drain in place.
9. Connect the Water Lines
Finally, connect the water lines to the sink. Apply a few wraps of Teflon tape to the threads of the water lines, and then screw the lines into the sink. Tighten the nuts until they are snug.
10. Turn On the Water Supply
Once the water lines are connected, turn on the water supply and check for leaks. If there are any leaks, tighten the nuts on the water lines until the leaks stop.
11. Install the Sink Strainer
The last step is to install the sink strainer. Place the strainer in the drain and tighten the screws until it is secure.

How To Replace A Kitchen Sink Faucet

How To Change Kitchen Sink Tapron Uk

How To Upgrade Your Kitchen Sink At Home With Ashley

How To Replace A Kitchen Sink Part 2 Removing Your Old

How To Replace A Kitchen Faucet

How To Replace A Kitchen Sink The Home

How To Replace A Kitchen Sink The Home

How To Upgrade Your Kitchen Sink At Home With Ashley

How To Change A Kitchen Faucet Family Handyman

Quick Tip Tuesday Changing From A Drop In To An Undermount Kitchen Sink


