How to Replace a Drop-In Sink
Replacing a drop-in sink is a relatively simple plumbing project that can be completed in a few hours. By following these step-by-step instructions, you can save yourself the cost of hiring a plumber.
Tools and Materials You'll Need:
* New drop-in sink * Plumber's putty * Utility knife * Adjustable wrench * Basin wrench * Flashlight * Safety glassesStep 1: Turn Off the Water Supply
Before you begin any work, turn off the water supply to your sink. There should be two shut-off valves located under the sink, one for hot water and one for cold water. Turn both valves clockwise until they are fully closed.
Step 2: Disconnect the Drain Line
Use an adjustable wrench to loosen the nuts that hold the drain line to the sink drain. Once the nuts are loose, you can remove the drain line by pulling it straight down.
Step 3: Disconnect the Water Supply Lines
Use a basin wrench to loosen the nuts that hold the water supply lines to the sink faucets. Once the nuts are loose, you can remove the water supply lines by pulling them straight down.
Step 4: Remove the Old Sink
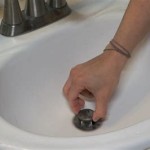
Use a utility knife to cut the plumber's putty around the edge of the old sink. Once the plumber's putty is cut, you can lift the sink straight up and out of the countertop.
Step 5: Clean the Countertop
Use a damp cloth to clean the countertop around the sink opening. Remove any old plumber's putty or debris that may be present.
Step 6: Apply Plumber's Putty
Apply a bead of plumber's putty around the edge of the new sink. The bead of putty should be about 1/4 inch thick and 1/2 inch wide.
Step 7: Set the New Sink in Place
Carefully set the new sink in place on the countertop. Press down on the sink to ensure that it is evenly seated on the plumber's putty.
Step 8: Reconnect the Drain Line
Insert the drain line into the sink drain and tighten the nuts until they are snug. Do not overtighten the nuts.
Step 9: Reconnect the Water Supply Lines
Insert the water supply lines into the sink faucets and tighten the nuts until they are snug. Do not overtighten the nuts.
Step 10: Turn On the Water Supply
Turn on the water supply to the sink and check for leaks. If there are no leaks, you have successfully replaced your drop-in sink.

How To Install A Drop In Kitchen Sink

How To Replace A Drop In Bathroom Sink Step By Youtube

Sinkology How To Replace A Drop In Kitchen Sink Youtube

Quick Tip Tuesday Changing From A Drop In To An Undermount Kitchen Sink Youtube

How To Install A Drop In Kitchen Sink Lowe S

How To Replace And Install An Undermount Sink Youtube

Installing A Drop In Kitchen Sink Canadian Woodworking

How To Install A Drop In Kitchen Sink

How To Replace A Drop In Bathroom Sink Step By Youtube

How To Install A Drop In Kitchen Sink Lowe S