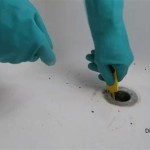
How To Change A Bathroom Sink Stopper
A bathroom sink stopper is a small but important part of your bathroom. It helps to keep water in the sink when you're washing your hands, brushing your teeth, or shaving. Over time, sink stoppers can become worn out or damaged, and they may need to be replaced.
Replacing a bathroom sink stopper is a relatively easy task that can be completed in a few minutes. Here are the steps on how to change a bathroom sink stopper:
1. Gather your tools and materials.
You will need the following tools and materials to change a bathroom sink stopper:
- New sink stopper
- Adjustable wrench
- Plumber's putty
- Rags
2. Turn off the water supply to the sink.
Before you start working on the sink, it is important to turn off the water supply. This will prevent water from leaking out of the sink while you are working.
To turn off the water supply, locate the shut-off valves under the sink. The shut-off valves are usually located near the base of the faucet. Turn the shut-off valves clockwise to turn off the water supply.
3. Remove the old sink stopper.
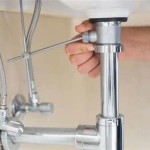
Once the water supply is turned off, you can remove the old sink stopper. To do this, use an adjustable wrench to loosen the nut that holds the stopper in place.
Once the nut is loosened, you can remove the stopper by hand. If the stopper is stuck, you can use a pair of pliers to gently pull it out.
4. Clean the sink drain.
Once the old stopper is removed, you should clean the sink drain. This will help to remove any debris that may be blocking the drain.
To clean the sink drain, use a rag to wipe away any debris. You can also use a drain cleaner to help remove any clogs.
5. Apply plumber's putty to the new sink stopper.
Before you install the new sink stopper, you need to apply plumber's putty to the base of the stopper. Plumber's putty is a type of sealant that will help to create a watertight seal between the stopper and the sink drain.
To apply plumber's putty, roll a small piece of putty into a ball. Then, place the ball of putty on the base of the stopper. Use your finger to spread the putty around the base of the stopper.
6. Install the new sink stopper.
Once the plumber's putty is applied, you can install the new sink stopper. To do this, insert the stopper into the sink drain. Then, use an adjustable wrench to tighten the nut that holds the stopper in place.
Be sure to tighten the nut until it is snug, but do not overtighten it. If you overtighten the nut, you could damage the sink or the stopper.
7. Turn on the water supply and test the stopper.
Once the new sink stopper is installed, you can turn on the water supply and test the stopper. To do this, turn on the faucet and allow water to flow into the sink.
The stopper should create a watertight seal and prevent water from leaking out of the sink. If the stopper is not creating a watertight seal, you may need to adjust the nut that holds the stopper in place.

How To Replace A Sink Stopper Quick And Simple Home Repair

Quick Tip 26 Pop Up Stopper Sticks Misterfix It Com

How To Fix A Bathroom Sink Drain Stopper 4 Easy Solutions

How To Replace A Sink Stopper Quick And Simple Home Repair

Fixing Tricky Pop Up Drain Sink Stopper Mechanisms Efficient Plumber

How To Fix A Bathroom Sink Stopper Step By Guide London Post

How To Remove A Sink Stopper The Home

How To Replace A Pop Up Sink Drain Remove The Old Bathroom Stopper Repair

How To Fix A Bathtub Or Sink Pop Up Stopper

How To Remove A Sink Stopper The Home

