Bathroom Sink Faucet Drip Repair
A dripping bathroom sink faucet is not only annoying, but it can also waste a lot of water. If you're lucky, you may be able to fix the problem yourself with a few simple tools and a little bit of time. Here's how to do it:
Step 1: Gather your tools
You'll need the following tools for this repair:
- Adjustable wrench
- Phillips head screwdriver
- Flat head screwdriver
- Replacement faucet cartridge (if necessary)
- Plumber's putty
- Rags
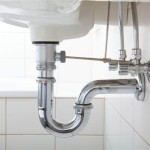
Step 2: Turn off the water supply
Before you start working on the faucet, you need to turn off the water supply. The shut-off valves are usually located under the sink. Once the water is turned off, open the faucet to release any remaining water in the line.
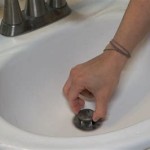
Step 3: Remove the faucet handle
Locate the set screw on the side of the faucet handle. Use a Phillips head screwdriver to remove the screw. Once the screw is removed, you can pull the handle off the faucet.
Step 4: Remove the faucet cartridge
Once the handle is removed, you'll see the faucet cartridge. The cartridge is held in place by a retainer nut. Use an adjustable wrench to loosen the retainer nut. Once the nut is loose, you can pull the cartridge out of the faucet.
Step 5: Inspect the cartridge
Once the cartridge is removed, inspect it for any damage. If the cartridge is damaged, it will need to be replaced. If the cartridge is not damaged, you can try cleaning it with a mild detergent and water.
Step 6: Install the new cartridge (if necessary)
If the cartridge is damaged, you will need to install a new one. To do this, simply insert the new cartridge into the faucet and tighten the retainer nut.
Step 7: Reassemble the faucet
Once the cartridge is installed, you can reassemble the faucet. To do this, simply insert the handle onto the faucet and tighten the set screw. Turn on the water supply and check for any leaks.
Tips
- If you're not comfortable working on your faucet yourself, you can call a plumber to do the repair for you.
- Be careful not to overtighten the retainer nut. This can damage the cartridge.
- If you have a two-handle faucet, you may need to replace both cartridges.

Properly Fixing A Leaky Sink Faucet Wallside Windows

Part 1 Of 2 How To Fix A Dripping Faucet Youtube

How To Fix A Dripping Moen Faucet Howtolou Com Youtube

How To Fix A Leaky Faucet True Value

5 Reasons Your Faucet Is Dripping Water How To Fix It

5 Reasons Your Faucet Is Dripping Water How To Fix It

How To Fix A Leaky Faucet The Home

Water Dripping From Faucet Why And How To Fix

Part 1 Of 2 How To Fix A Dripping Faucet Youtube
Bathroom Faucet Is Leaking Or Dripping